Pages

Thursday 19 February 2015

A Host of Golden Daffodils Card – Tonic Studios Plush Peony


Hi Everyone

Spring is almost upon us (thankfully) and soon all will be green.  So tonight MJ is sharing a card she made with Mother’s Day in mind and St David’s Day fast approaching.

But this is only a quick share!  So here it is…..

MJ has used the Tonic Studios Plush Peony Die Set to make the daffodils and also to create the backing panels.


Host of Golden Daffodils Feb 2015


She started with card cut to 8 1/4” x 12” and scored at 4” and 8” to make the tri-fold card base.  Then MJ cut the panels into the card, layered yellow card behind all 3 panels.  She cut the centre panel topper using just the outer cut dies of the set.  The leaves were made by folding a strip of green paper over and cutting a half leaf shape out.  The sentiment was cut from ‘If Friends Were Flowers’ die set.

What Was Used

Tonic Studios Plush Peony Die Set

Tonic Studios If Friends Were Flowers Die Set

Tonic Studios Royal Fern Die Set

Tonic Studios Funky Glue Pen

Core’dinations Gemstones Card – Cityscape


We hope you have been inspired.

Thanks

for

Popping By

xx

Tuesday 10 February 2015

Pure Sheen Flowers – Tonic Studios


Hi Everyone

Hope you have all had a great day.

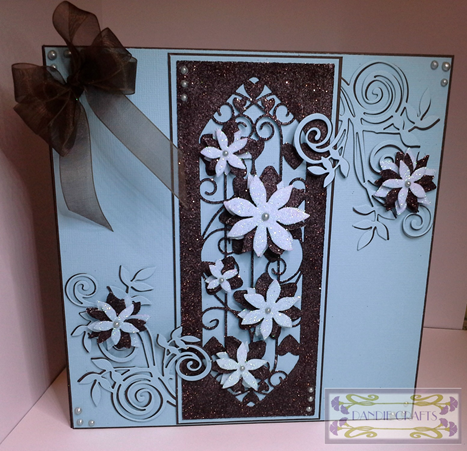
MJ here with another project for you showcasing Tonic’s new Verso Flower Panels.  In this card I have used the Radiant Roselily die set together with the glorious new Nuvo Pure Sheen Glitters and Crystal Drops.

The colours range in the glitters is out of this world and when paired up with the Crystal Drops to add the finishing touch…well need I say anymore?  I don’t think so.  Gorgeous, gorgeous, gorgeous.

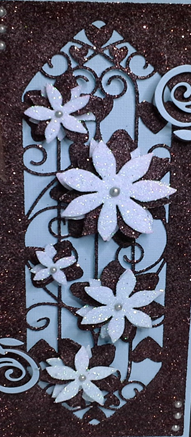
I made an 8” x 8” card base from dark brown card and matted some Core’dination card in Aruba (I think that’s what it’s called?).  I then die cut the central panel using double-sided adhesive paper onto card and then peeling the top layer off and coating with the brown glitter.  I also die cut some of the flowers in the set the same way as above and coated half with the brown glitter and the others with the pale blue glitter.  These were then layered up with a 3D glue gel and left to dry.


Flower Trellis 2 - Feb 15


Then I layered up some brown and blue card and glued this to the centre front of the card base adding the flourishes as I went. Next I added the brown glitter panel on top together with the flowers.  To finish the card I used some Crystal Drops in the flower centres and corners of the card.  The final touch was to add the bow.  Viola!


Flower Trellis 2 - Feb 15


What Was Used

Tonic Studios Verso Radiant Roselily Die Set

Tonic Studios Royal Fern Die Set

Nuvo Pure Sheen Glitters – Chocolate and Aqua

Nuvo Crystal Drops – Neptune

Tonic Studios Funky Tacky Glue


We hope you have been inspired.

Thanks

for

Popping By

xx

Thelwell – some more inspiration for you :)


Hi Everyone

We’ve just got to say that you are loving, loving, loving the new Thelwell CD’s and Papercrafting Kit!!  All MJ can say is WOW!!

A very quick post for you tonight just to give you another couple of ideas.

These designs are adorable!  What a lovely way to present a gift to someone special?  I know we would feel very special if we received this!

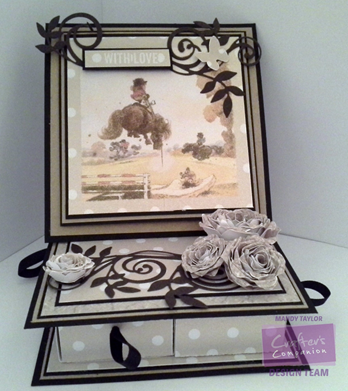
MJ has made this using the Thelwell CD.  She chose to make a Trinket Box which is all done ready for you on the CD.  All you need to do is glue and add decorations.  The flowers are taken from the embellishment section, rolled and all the petals shaped outwards using the end of a quilling tool.  It has been made from Centura pearl to print the design on and then Kraft and Black Matte card to layer with.


Thelwell 5 - Jan 15


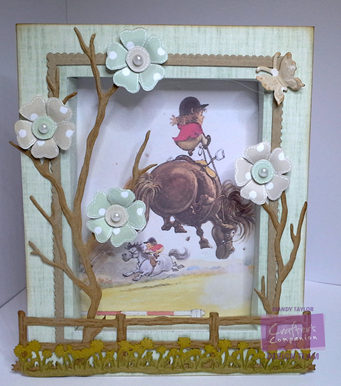
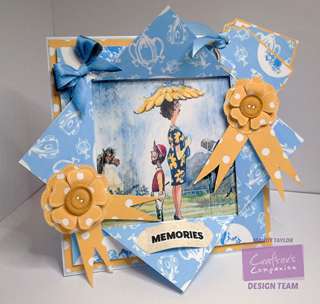
In the next project below MJ has printed a Frame Card, added acetate and has then used some die cuts to decorate.  She used Sheena’s Perfect Partners dies for the fence, trees and daisy border.  The flowers are from the embellishments section of the CD.


Thelwell 4 - Jan 15


We hope you have been inspired.

Thanks

for

Popping By

xx

NEW Flower Power!! – from Tonic Studios


Hi Everyone

MJ has been working with the new floral Verso Dies from Tonic Studios launching tonight 9pm over on Ideal World as POD.  She has loved coming up with ideas for them and she can’t wait any longer to share them with you.

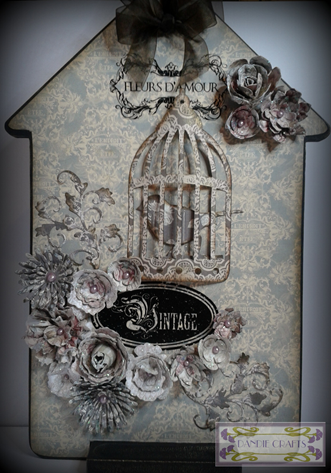
Here is MJ’s first project for you to see.  She started with a cheap £1.99 chalk board!

She has used papers from Tonic’s recent Cameo launch to cover the base using the Pure Matte Adhesive.

Altered House Chalk Board - FEb 10 2015 2


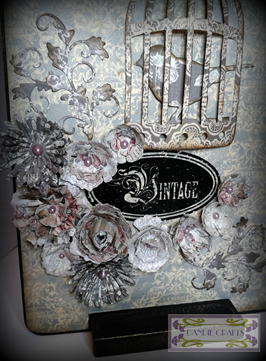
Next she die cut lots of flowers from all the die sets and layered and shaped them adding some Nuvo Glitter on the edge of the petals and Crystal drops for the centres of the flowers.  All the flowers are also made from the papers.


Altered House Chalk Board - Feb 10 2015


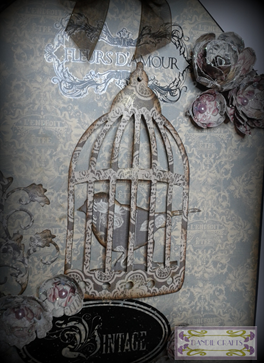
Before gluing the flowers and die cut bird and cage MJ added a couple of the Parisian Transfers and distressed the edges of the house with Potting Soil Archival Ink.


Altered House Chalk Board - Feb 10 2015 3


The flowers are gorgeous but the panels that are part of the set ……well you’ll have to tune in to see them in action.  The Design Team have made wonderful projects to inspire you.  These are MJ’s favourite ones to date (she’s a sucker for a dimensional flower).

MJ will be back soon with another project to inspire you along the way.

What Was Used

Tonic Studios Verso Radiant Roselily Die Set

Tonic Studios Verso Bellus Buttercup Die Set

Tonic Studios Verso Delicate Daisy Die Set

Tonic Studios Verso Plush Peony Die Set

Forever Moments Parisian Transfers

Forever Moments Decorative Paper Pack – Millesime Voyage

Nuvo Pure Sheen Glitter – Diamond

Nuvo Crystal Drops – Raspberry Pink

Forever Moments Gilding Blush – Gold Leaf


We hope you have been inspired.

Thanks

for

Popping By

xxx

Sunday 8 February 2015

New Thelwell will be here on Monday!!!


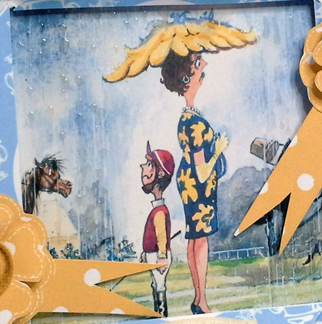
On Monday 9th Feb at 8am, tomorrow, Crafter's Companion are launching their very latest CD collection on Create and Craft. The wonderful Thelwell themed CD, stamps and papercrafting kit is great to design your projects with. 

The Design Team have made loads of samples for you to see and be inspired by.  After seeing this range you are going to want to get your hands on all the goodies and craft, craft, craft!

So here are a couple of sneak peeks for you today….

In this card MJ have used one of the Fold Back Card designs from the CD together with embellishments, greeting and coordinating backing paper.  This design made her giggle we have to say and great for lots of projects.


Thelwell 1 - Jan 15


Add some glossy accents to make the rain shine.


Thelwell 1 - Jan 15


Another one for you….

The images on this CD (and there is a digi CD too!!)  cover so many different age groups, occasions etc. you’ll wonder why it wasn’t brought to you sooner..lol

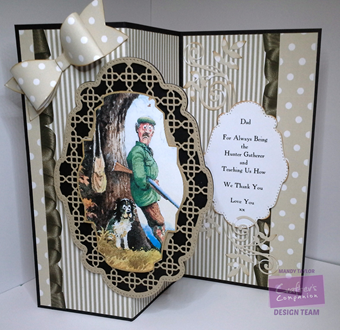
Here MJ has made a Father’s Day card using a Shaped Topper, coordinating backing papers, borders, embellishments and the Verse Writer all from the CD.  She loves the colour palette that has been used in the range.


Thelwell 7 - Jan 15


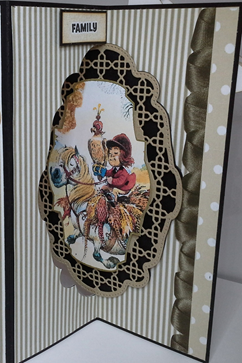
And here is the back side of the panel.


Thelwell 8 - Jan 15 (spelling mistake)


MJ will be back soon with some more inspiration from the Thelwell collection.

We hope you have been inspired.

Thanks

for

 Popping By

xx

Monday 2 February 2015

Crafting Musketeer’s February Challenge #22 - Cute


Hi Everyone

It’s Challenge time – wooo hooo! and it’s a fab one this month too. 

This month the theme is ‘Cute’ and the sponsor for this is the fabulous Cuddly Buddly.

Here is a little bit about them.
 

10433309_888225711209470_1044831130311454407_n


"Cuddly Buddly® is an independent online craft supplies business based in the UK. We understand how important it is to help people keep enjoying their creative hobbies and offer a wide selection of craft products from paper and string to designer digital art, ready to be delivered to you at just the click of a button.


How on earth, you may wonder did we arrive at the name 'Cuddly Buddly'. When Kim began drawing her teddy bears many of her customers commented on how they felt the little bears made you want to cuddle them. Hence the name, Cuddly Buddly - a family term of endearment we use especially towards younger members when a seriously squishy hug is being sought. Since then the name's stuck, like honey to a bear's paw!"

The prize for this challenge is a £10 Gift Voucher for the store.

So here is my offering this month using one of the fab Cuddly Buddly digi images and some gorgeous backing papers from them too.  She is adorable!
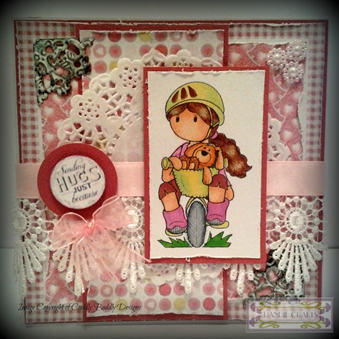
 

Feb 15 Cuddly Buddly


I have coloured using some Copic Ciao and Spectrum Noir pens this time around onto Neenah Solar White card.
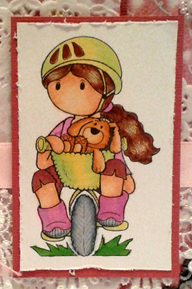
 

Feb 15 Cuddly Buddly

Once I had finished colouring her I started to work on my card layout.

First I matted some Core’dinations card on to my blank 6” x 6”.  Next I distressed a piece of gingham backing paper and added this.  I loved the heart design so chose this as my next layer distressing the edges as before.  The rectangular circle paper was backed with Core’dination card and was glued to the front.  Then I added all the pretty stuff; a doily, some lace and ribbon.  To finish I glued my image to some card and popped her on top of my other elements, added my greeting disc and bow together with a couple of metal corners that I had painted over with Picket Fence Distress Paint.  Viola!
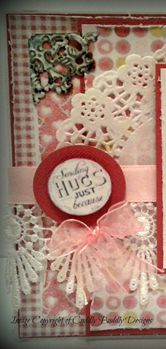
 

Feb 15 Cuddly Buddly


What Was Used

6” x 6” Card Blank

Cuddly Buddly Digi Image and Backing Papers

Copic Ciao Pens

Skin – E000, 00, 11, 21, 31

Hair and Trousers – E11, 25, 37

Helmet, Bike and Basket – Y11 and YG11

Teddy – SN; TN1, 2 and 3

Boots – SN; PL1 and 2

Tyres and Boot Soles – SN; BGR1,2 and 3


Now it’s your turn and we are so looking forward to seeing what you come up with. xx

The challenge this month will end on 28th February at 8pm.  Good Luck!

And if you don't have your own blog , don't worry ,  remember we have a Facebook Page for you to post your entry onto. https://www.facebook.com/pages/Crafting-Musketeers-Challenge-BLOG/320703981385124

See The Crafting Musketeers blog for challenge rules and lots of inspiration from the Design Teams. 

We hope you have been inspired. 


Thanks for Popping By

xx