
Hi Everyone
Today we have a great project for you from Debbie (it's her turn at last...lol)
It's a fantastic tutorial so let's get on and show you :)
Blossom Arch
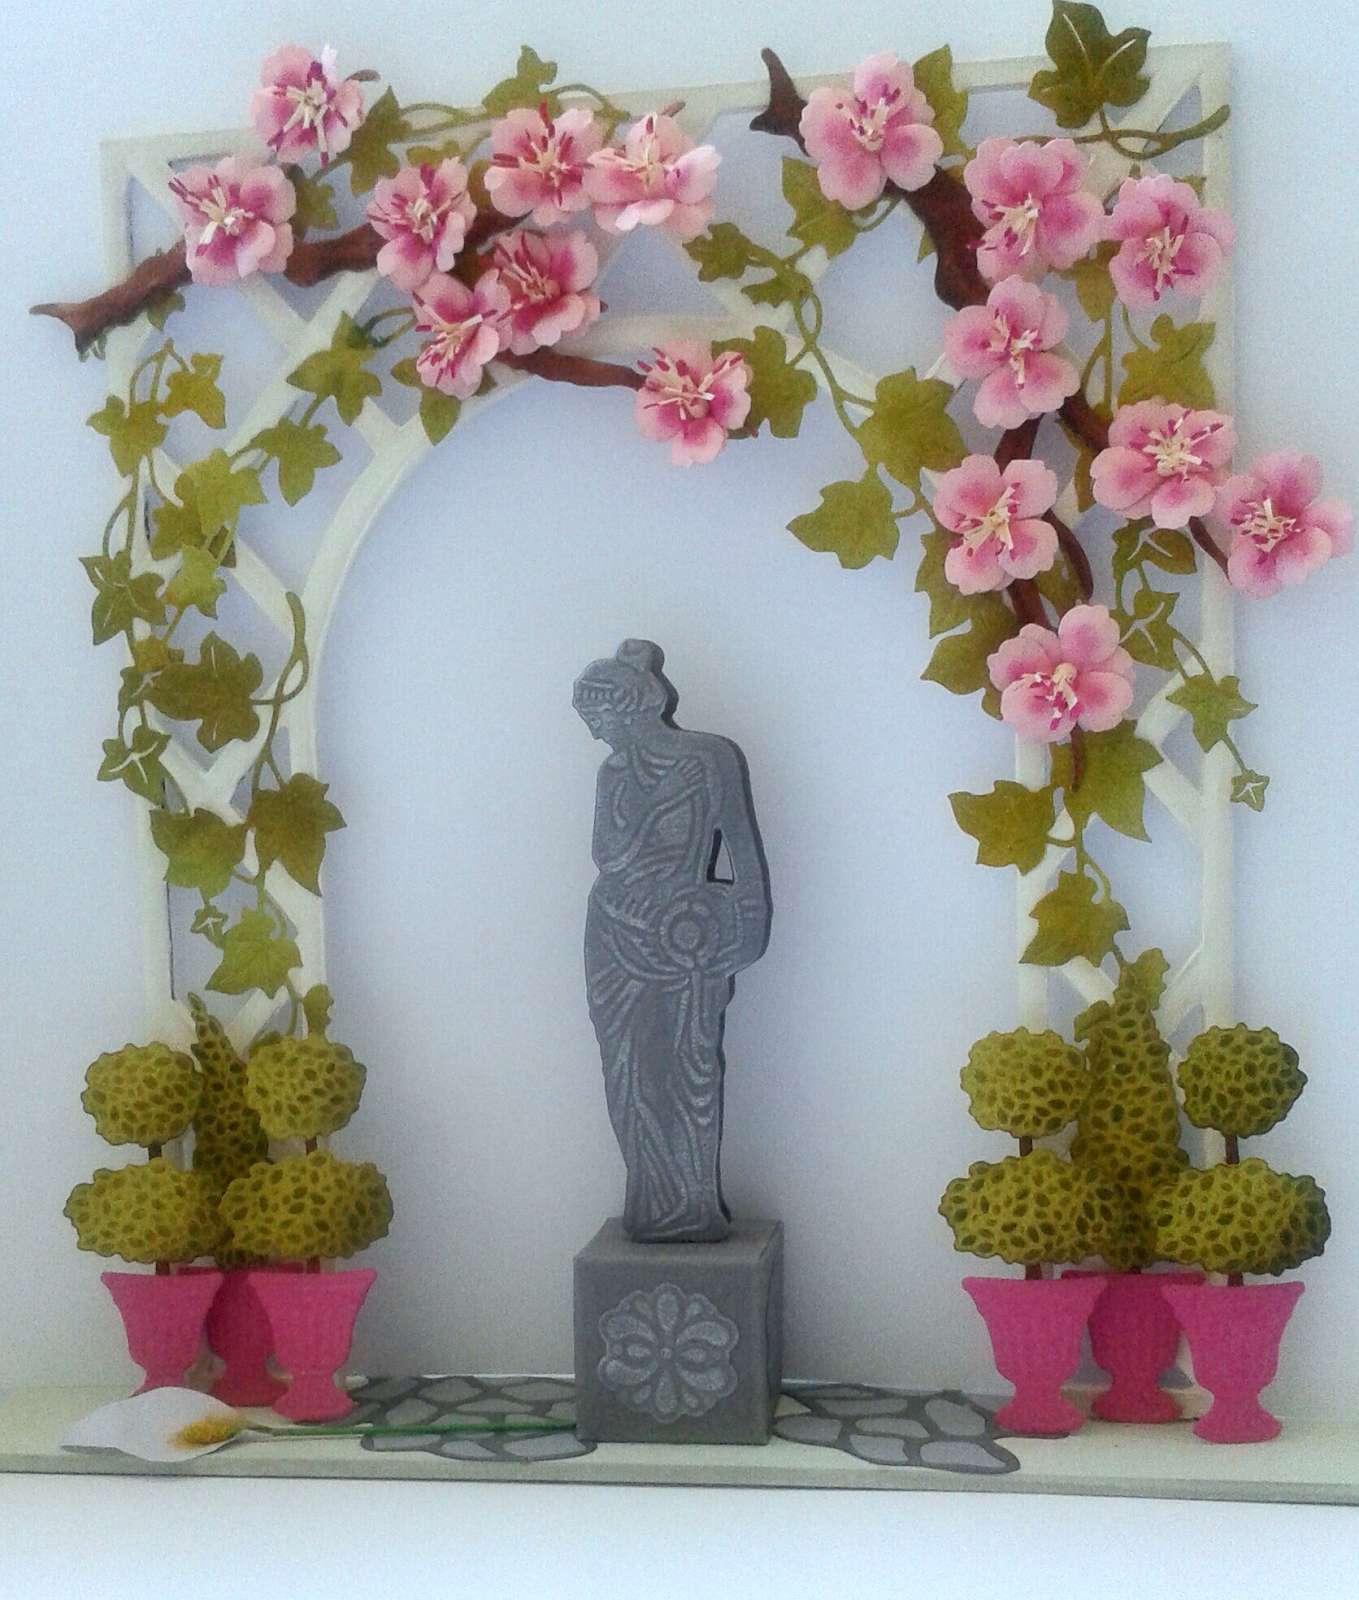
This was so much fun starting with the blossom & seeing
what developed.
Starting with a MDF trellis arch from Anna Marie Designs,
paint with gesso as a base for a coat of Snowflake colour Fresco paint from PaperArtsy.
For the base of the trellis I coloured the Snowflake paint with a little Peeled
Paint Distress Ink to give the impression of grass as you would have in a
garden.
The Cherry Blossom is made from the Cherry Blossom die set
(1006) from Elizabeth Crafts Design’s Susan’s Garden range. Google Elizabeth
Crafts Designs & select their You Tube Channel & scroll down to the
Susan’s Garden section & watch the
video tutorial for the cherry blossom.
Debbie made two branches of blossoms. To colour tip the stamen a
Spectrum Noir pen BP6 from the pinks set was used.

The ivy was cut from the Sue Wilson Trailing Ivy die set
(CED1423). A big “thank you” to John Lockwood for the technique for colouring
the card to give you a realistic looking
coloured ivy. Take a piece of white card & 3 or 4 different coloured green
Distress inks – the less they seem to co-ordinate the better. Using Cut’N’Dry
foam blend patches of all the green inks on to the card. It will look like a
piece of camouflage – you will probably think it looks awful – Debbie did. BUT,
the magic happens when you then cut your trailing ivy out. Each one will pick up little sections of the
different colour greens & it will look great. The key thing to remember is
to make your inked piece of card dark enough to give you a realistic tone for
the ivy.

Using Cosmic Shimmer glue stick your ivy in a pleasing
arrangement over the top half of the trellis.
As the cherry blossom branch will be interesting &
uneven shapes it is better to use Collal 3D glue gel to stick that over the
ivy.
To give the illusion of a crazy paving footpath running
through the arch the Pebbles die (1026) from Elizabeth Crafts Designs was used.
It was cut twice, once from a light grey card stock & once from a dark grey
& the light grey outline was used & in filled with the darker grey
cobbles. Cut to size & stick to the base under the arch using Cosmic
Shimmer Dries Clear glue.
The statue (Marianne Designs CR1301) was cut twice from the
dark grey PaperMillDirect card & highlighted using a silver gilding wax to
make it look metallic. Make a small tube from cardstock & after having
gently curved the statue die-cuts stick around the back & front of the tube
to make a standing statue. Make an inch & half square box out of the same
dark grey card as a base for the statue. Embellish each side of the box with
pieces cut from the grey card using any small die (probably from the centre of
a set that you thought you would never use!) Stick the statue to the base using
the Collal 3D glue gel & the base to the trellis base with Cosmic Shimmer
Dries Clear Glue.

The topiary sets were cut using Marianne Designs CR1303. Cut
6 pots from a fuchsia pink card
(PaperMillDirect was used here). The rest of the topiary plants were coloured
to suit the look Debbie wanted. You will need to cut 10 stems & colour them
brown (a Spectrum Noir pen from the browns set was used for this). To get the
realistic looking colour for the topiary foliage Debbie coloured a piece of
plain white card with Shabby Shutters Distress Ink using the direct to paper
technique. Once the ink is dry, cut out
2 x pyramid foliage & 4 each of the more rounded foliage. While each piece
is still in the die colour through the die using an Ink Duster brush and Forest
Moss Distress ink. Remove the die-cut from the die & lightly ink dust over
the whole surface with the Forest Moss Distress Ink & then finish each
piece by colouring more heavily on the right hand side to give the appearance
of shaping. Stick a stem piece to each of the pots & add a 2nd piece
to 4 of the stems to give the height needed for the duo topiary. Cut 5mm foam
pads down to stick the foliage to the stems as this give much more dimension to
the topiary. The 2 pyramid topiary were fixed to the trellis arch using 2mm
foam pads. To make the duo topiary stand further forward Debbie built little
collums of stacked foam pads to give the desired distance from the trellis.


